


It’s that time of year -tech nerd Christmas, thanks to new Apple iPhone and Google Pixel launches! Following on from the eSIM swapping journey with Optus and Telstra last week, Vodafone also empowers customers to swap to an eSIM, or move from an eSIM on one device to another eSIM on another device, using the self service tools available via My Vodafone, without requiring a store visit.
The process is done online via ‘My Vodafone’ in your favourite web browser – no app required as per Optus and Telstra. For this reason, I find the Vodafone eSIM swap process much simpler and straightforward, even if it’s not as ‘sexy’ as using their iOS or Android app. Just make sure to perform the swap on a different device to the one you’re putting the eSIM on!
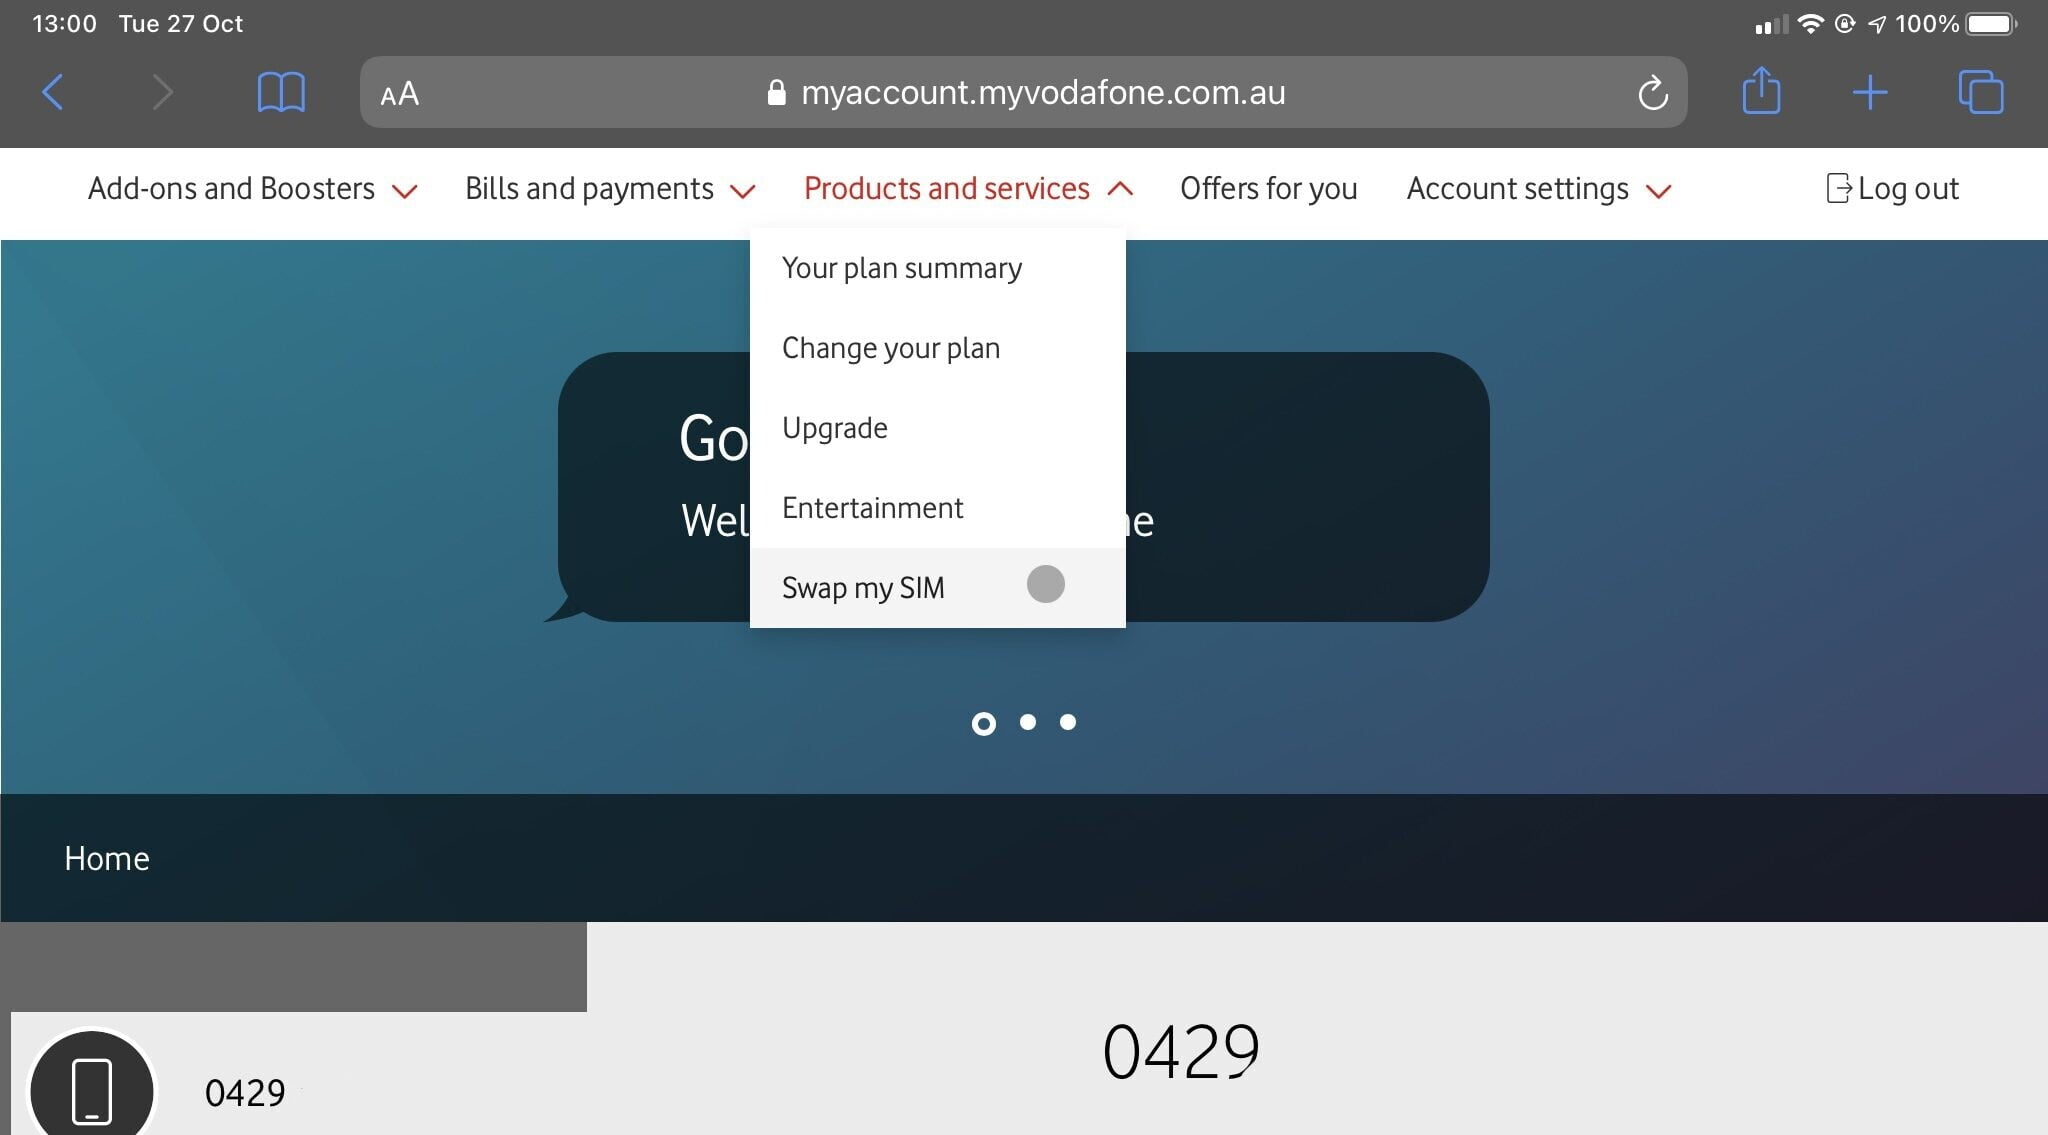
Head on over to My Vodafone and authenticate with your detail. Ensure your service is selected from the left if you have more than service on your account, and then head to ‘Swap my SIM’ under the Products and services menu
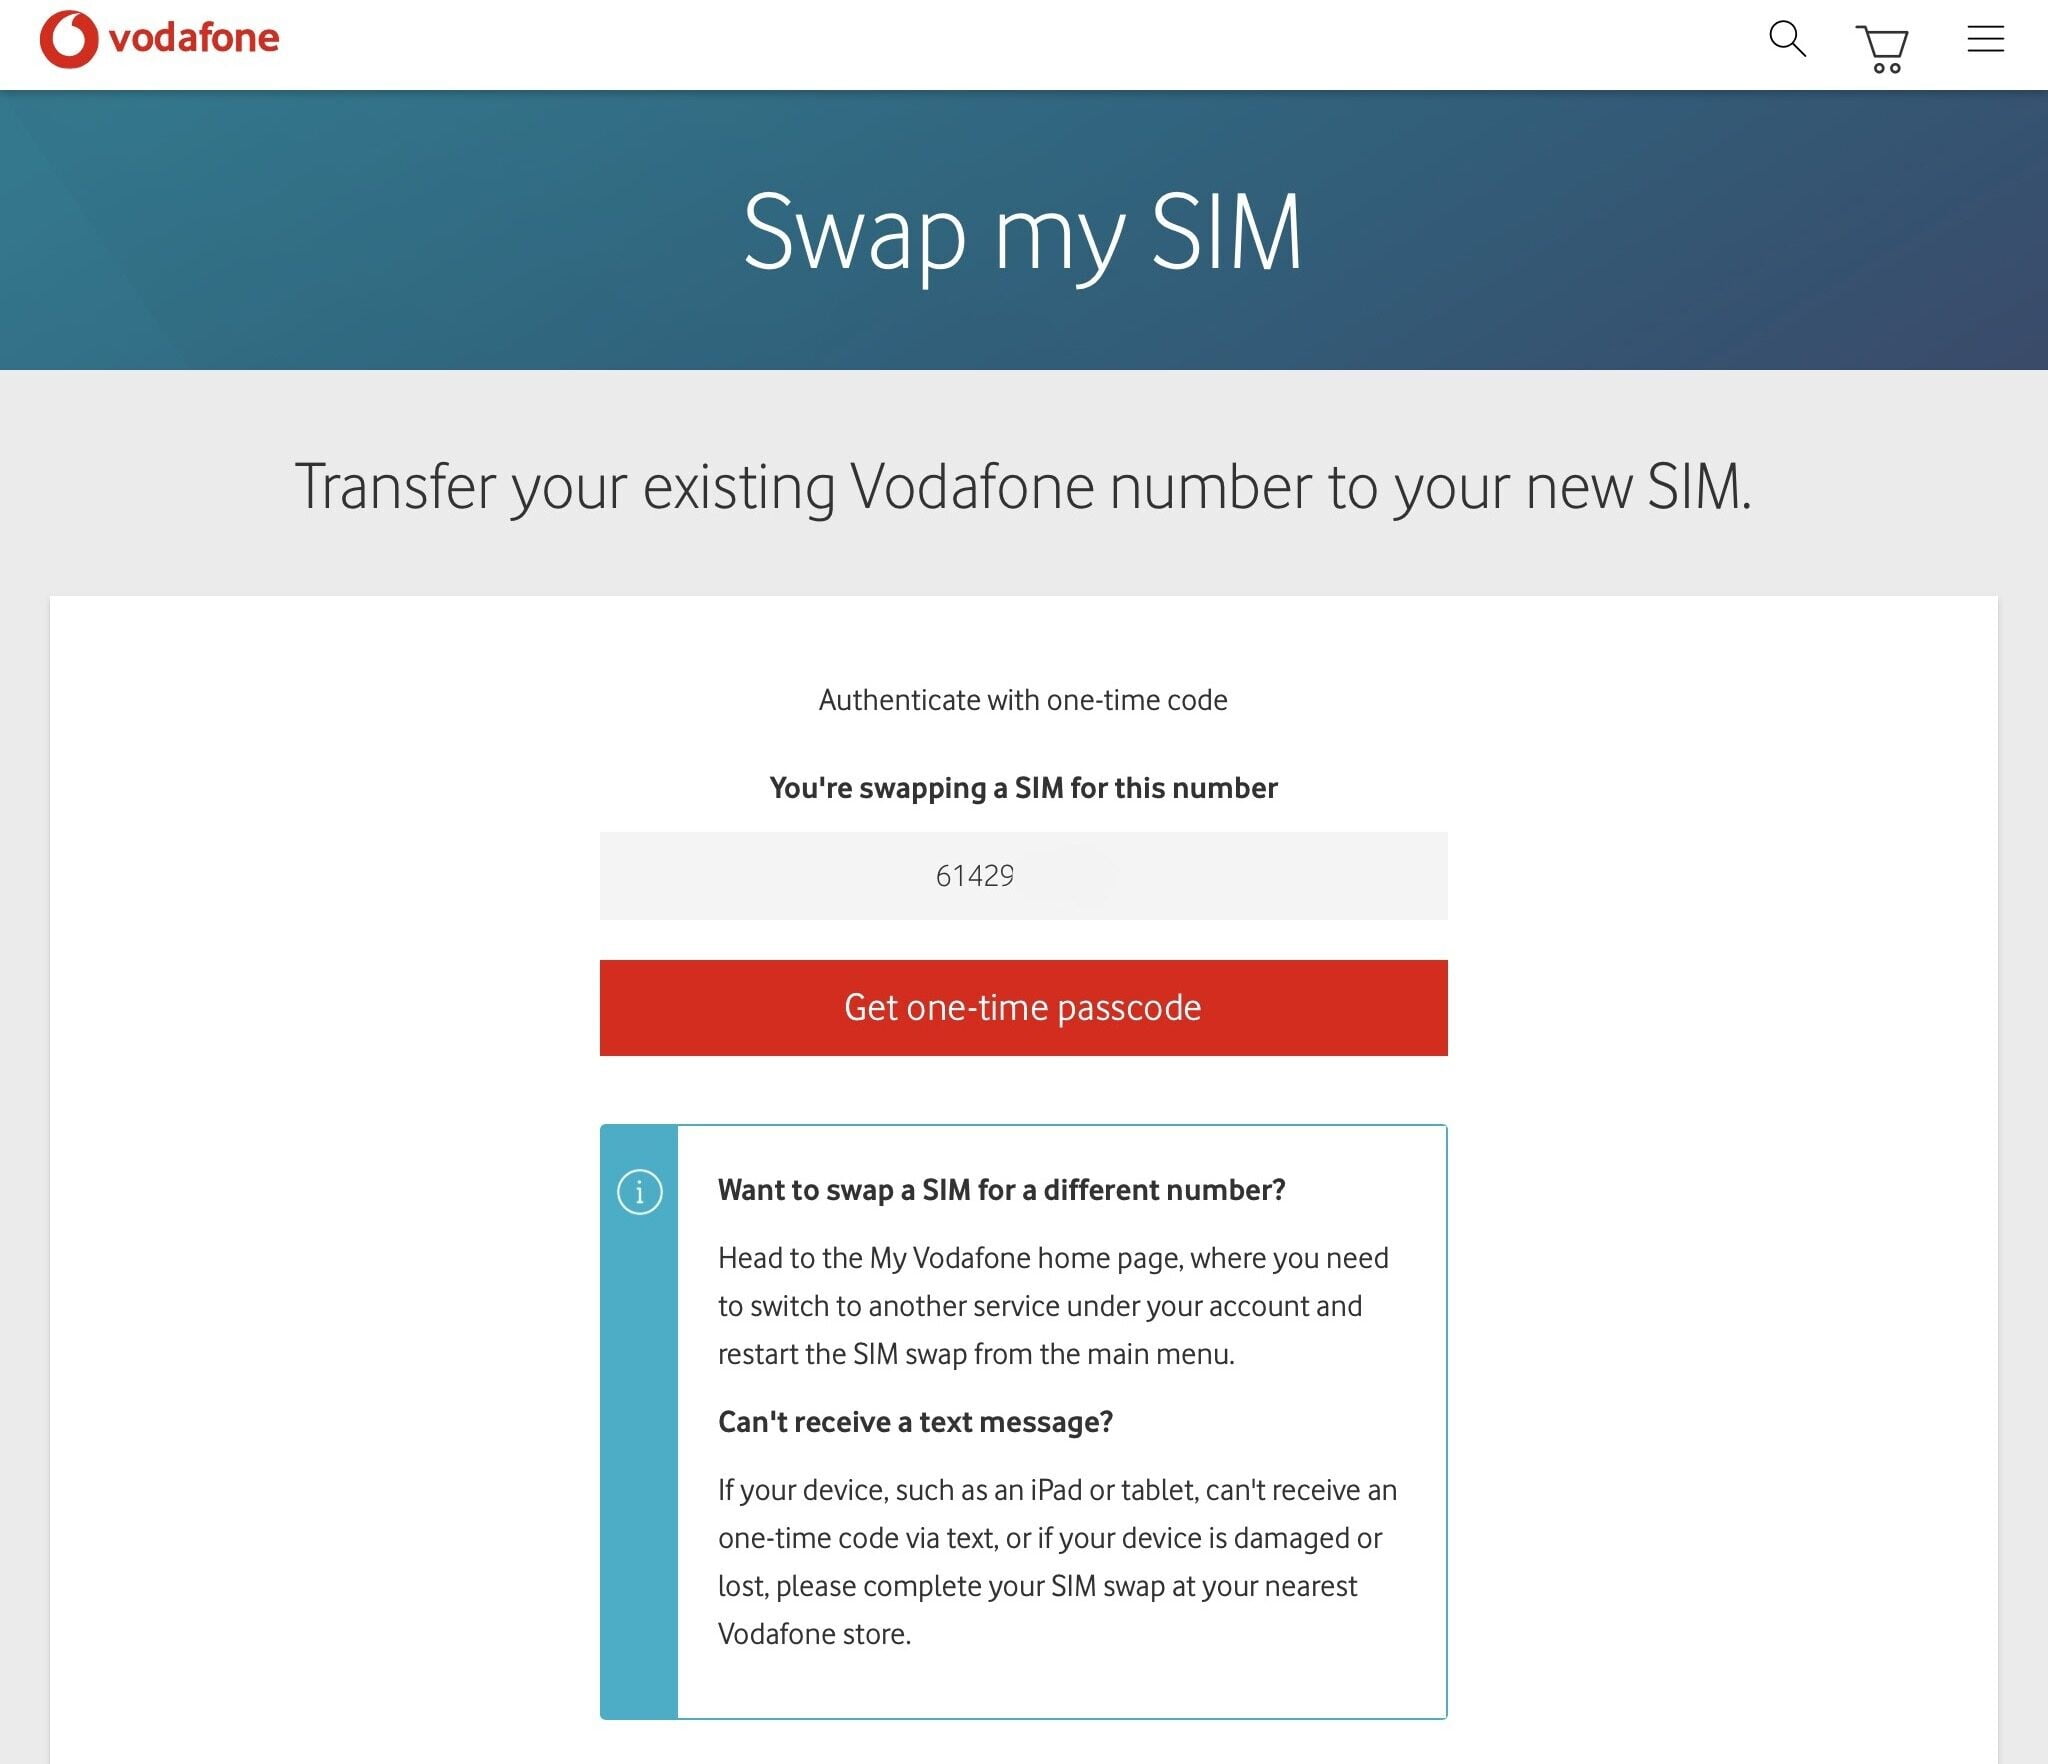
You’ll be prompted to confirm the number you’re swapping a SIM for, as well as prompted to enter a one time code delivered via SMS to the number you’re swapping. This means that, like Optus, you must have access to receive an SMS on that number – so that rules out swapping from a device like the iPad, or if you’ve lost your phone.
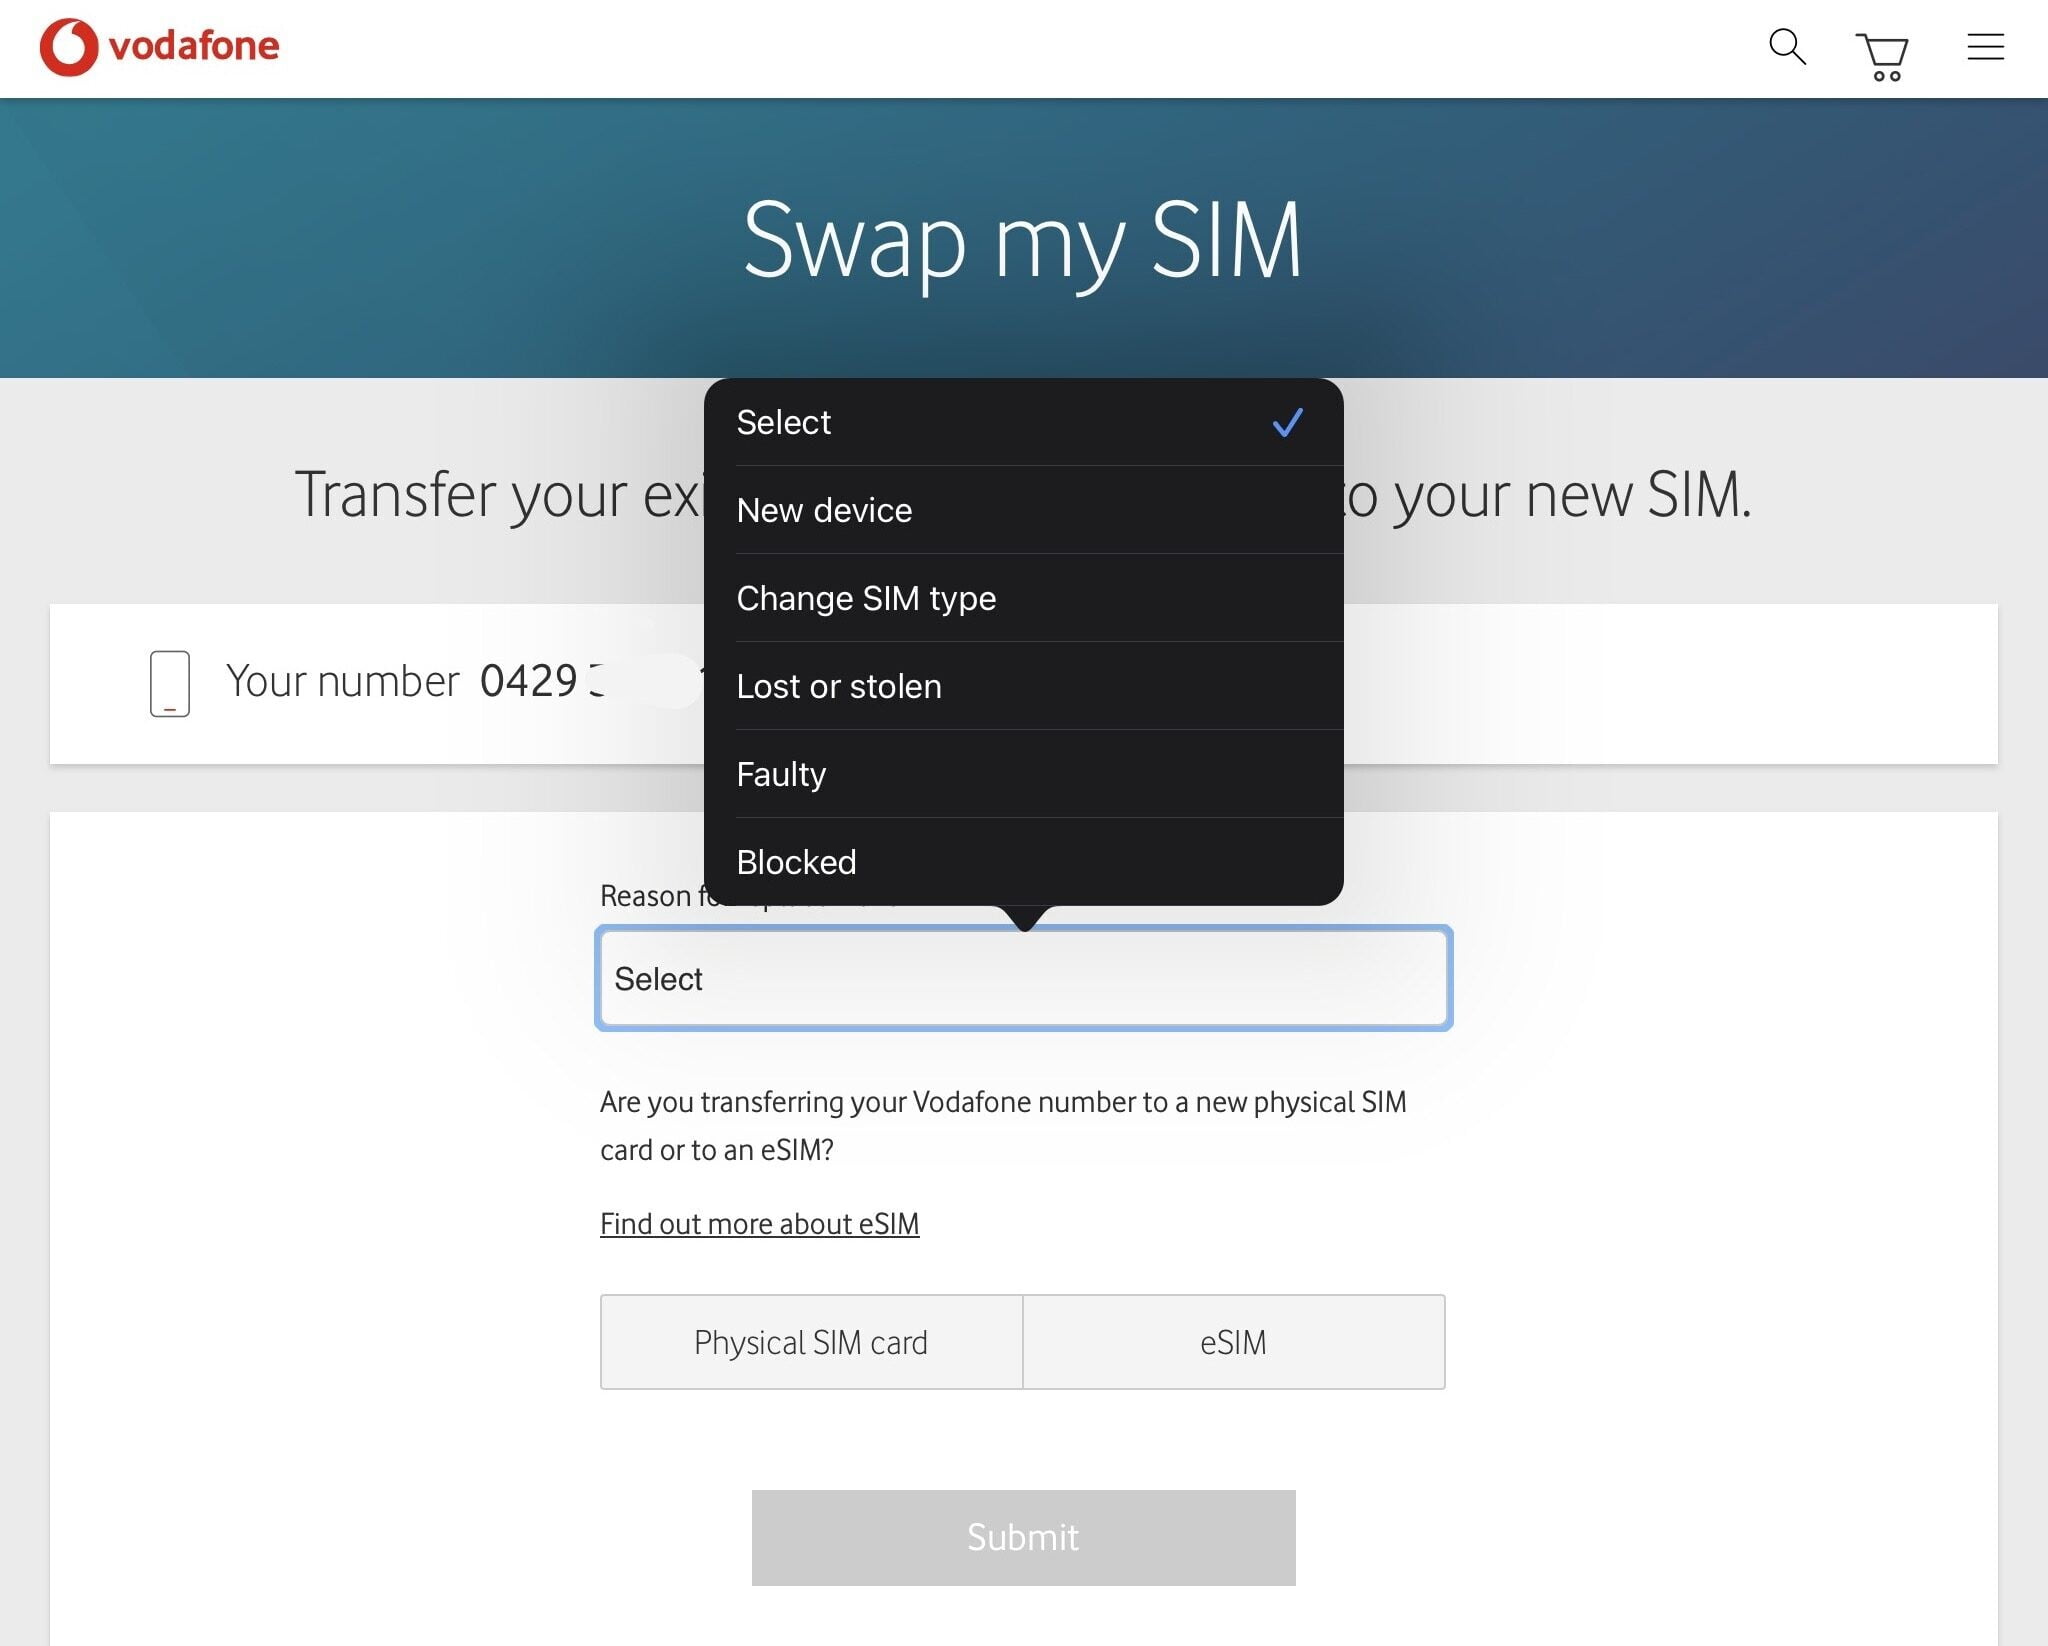
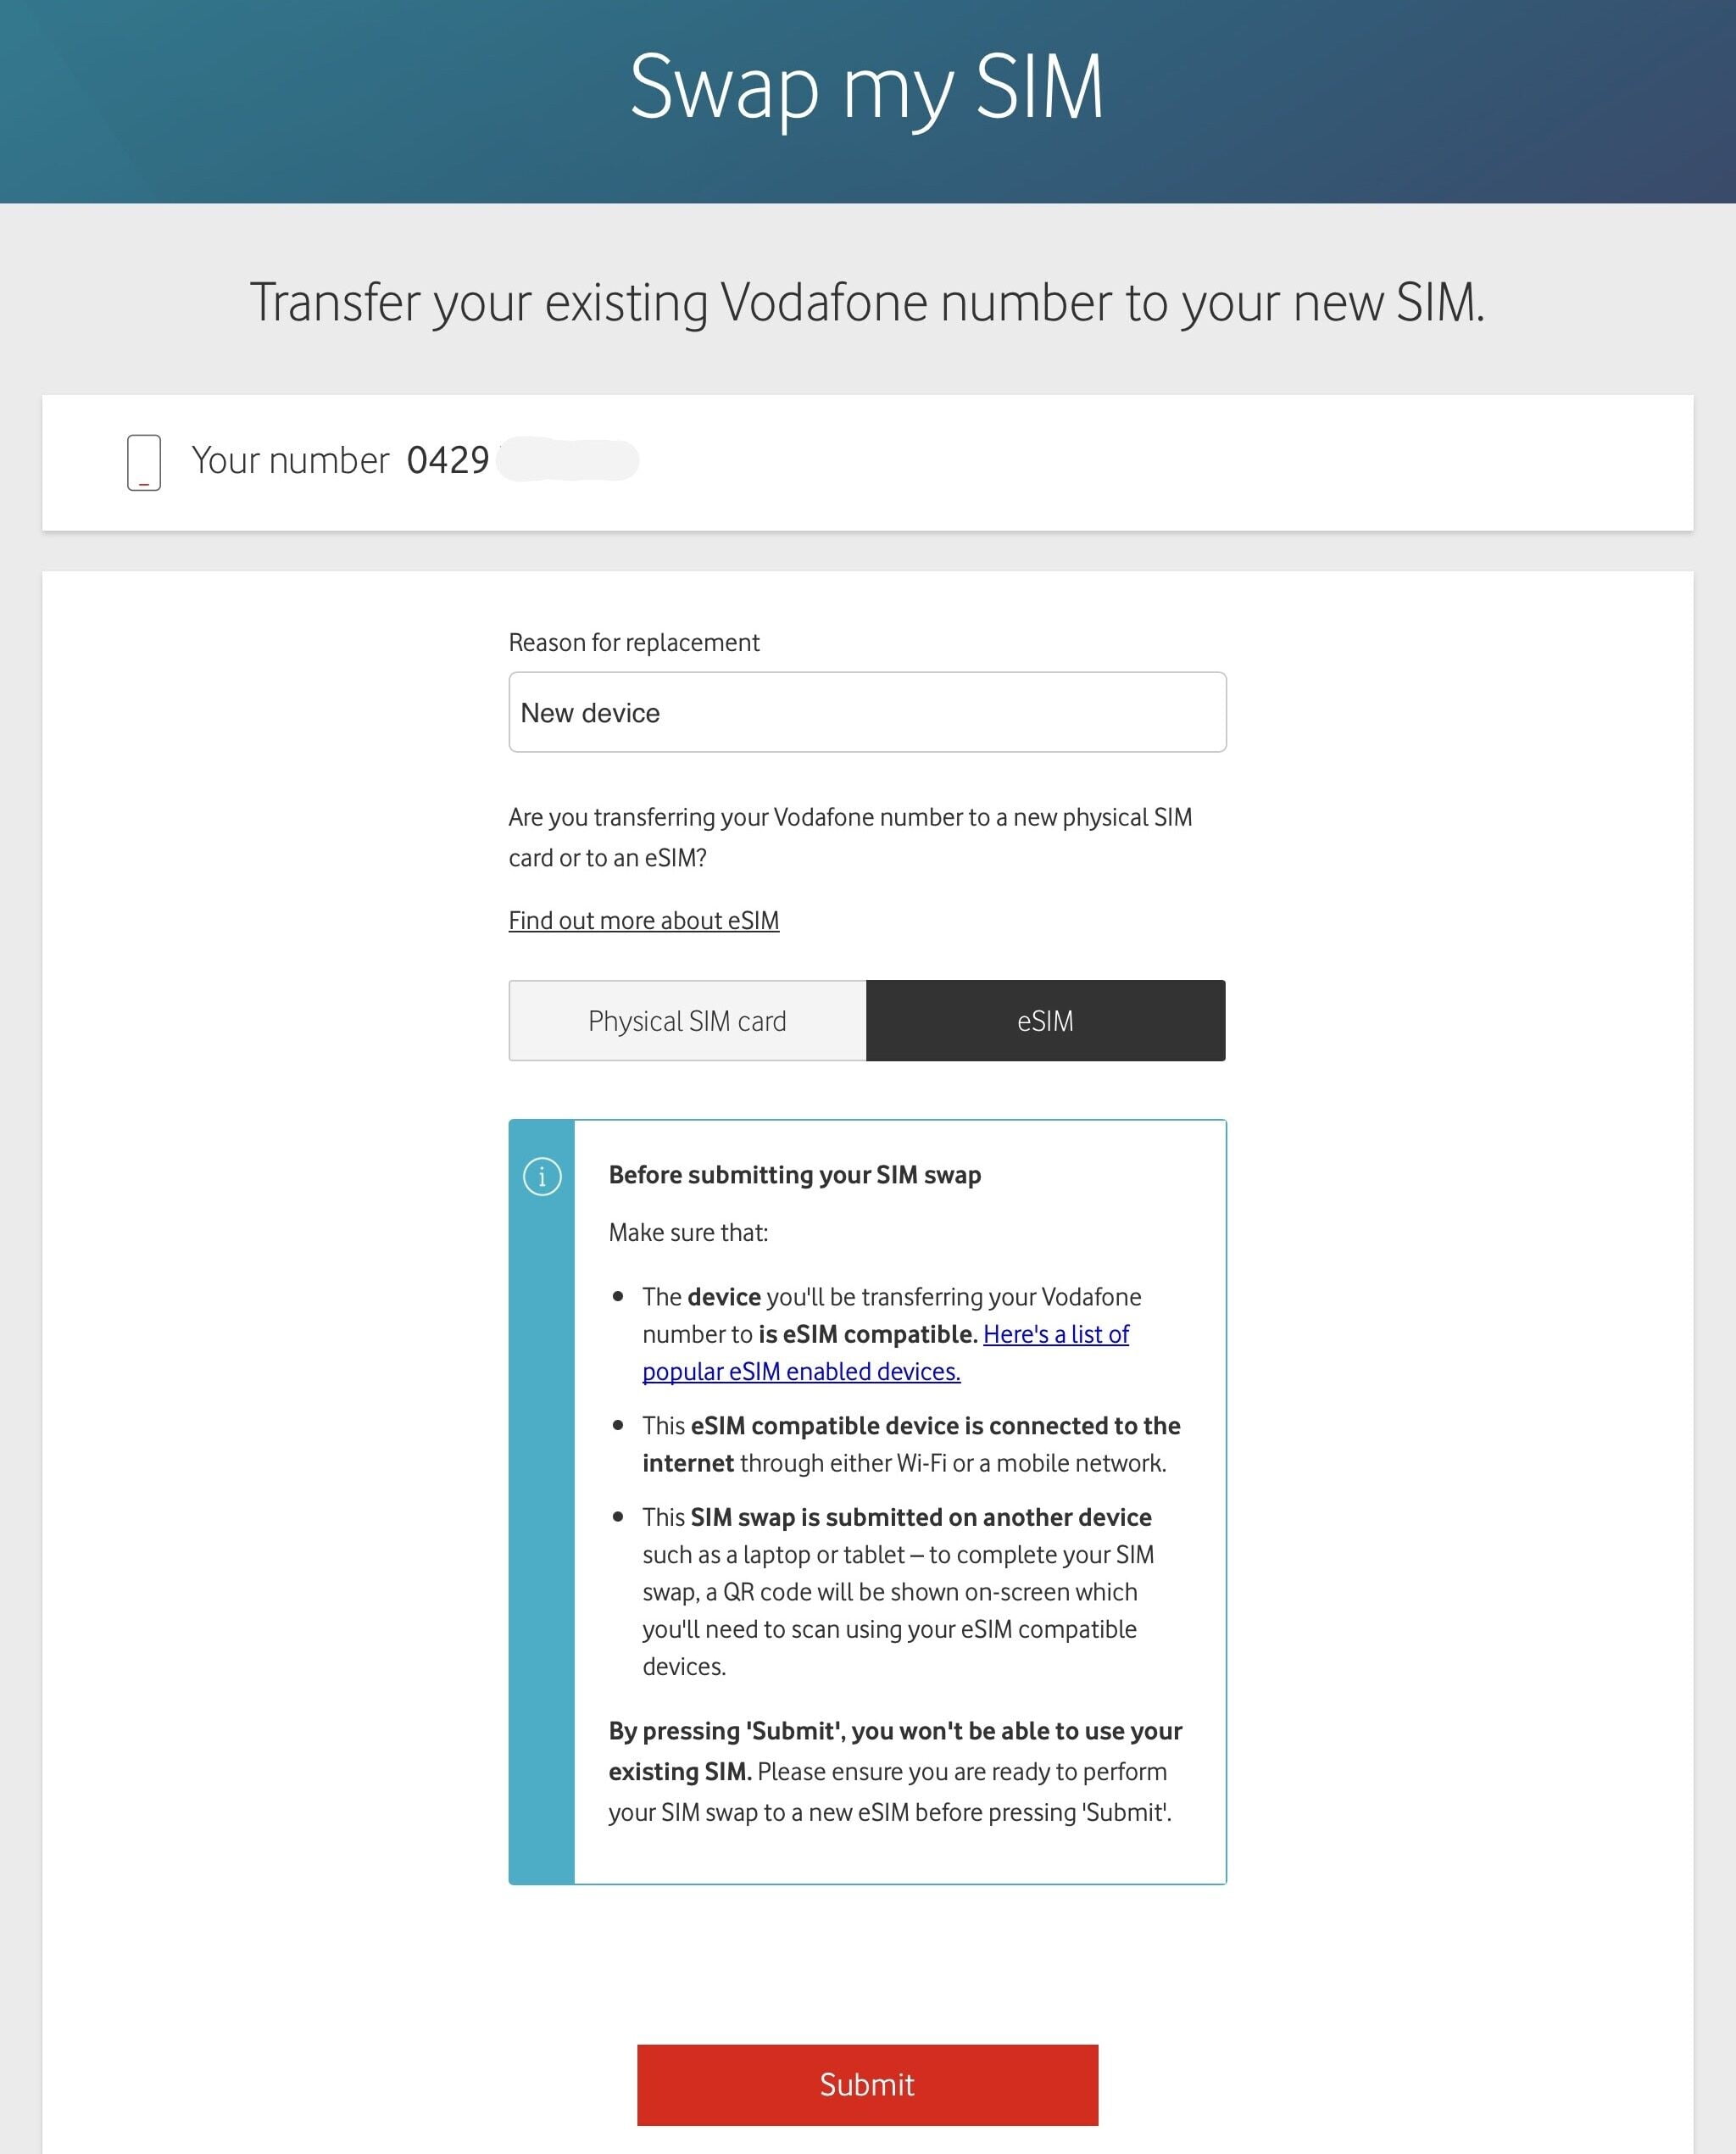
Once that’s done, you’ll be asked to select a reason for the SIM swap. I don’t believe this makes a difference, though if your old phone was lost or stolen, it should prompt you to ensure the IMEI of the device is blocked. If you’re reading this article, you’re probably going to hit ‘eSIM’ from here. Though if you have a spare blank plastic SIM handy from Vodafone, you can swap to that here too.
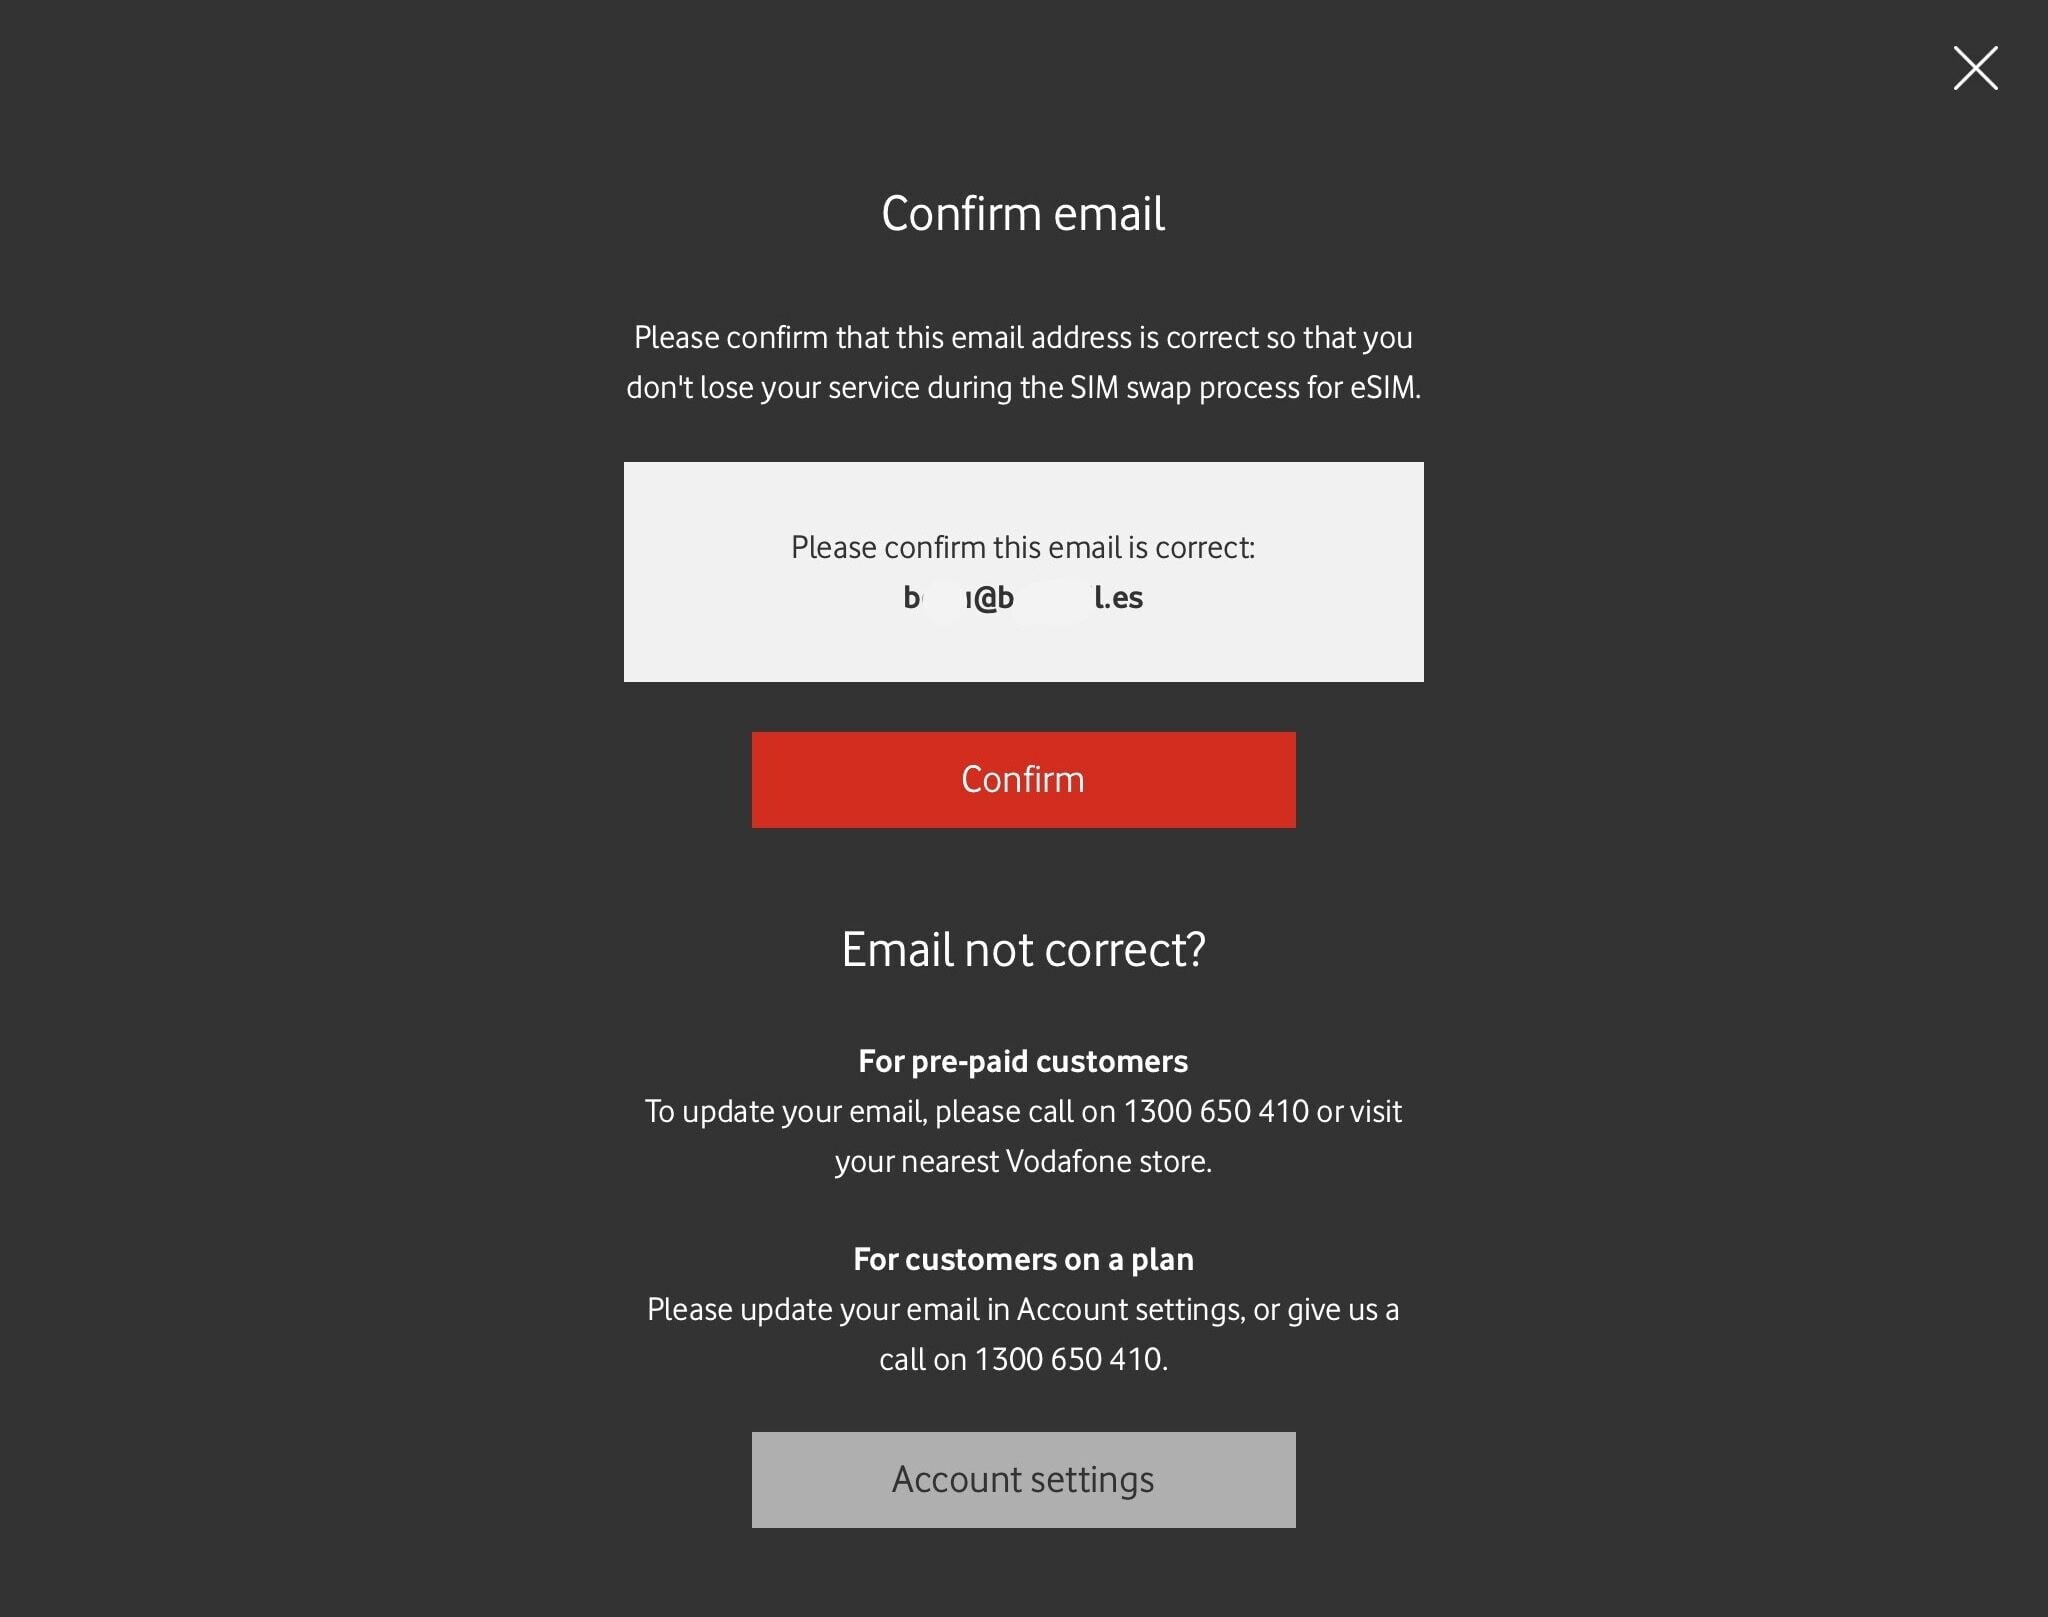
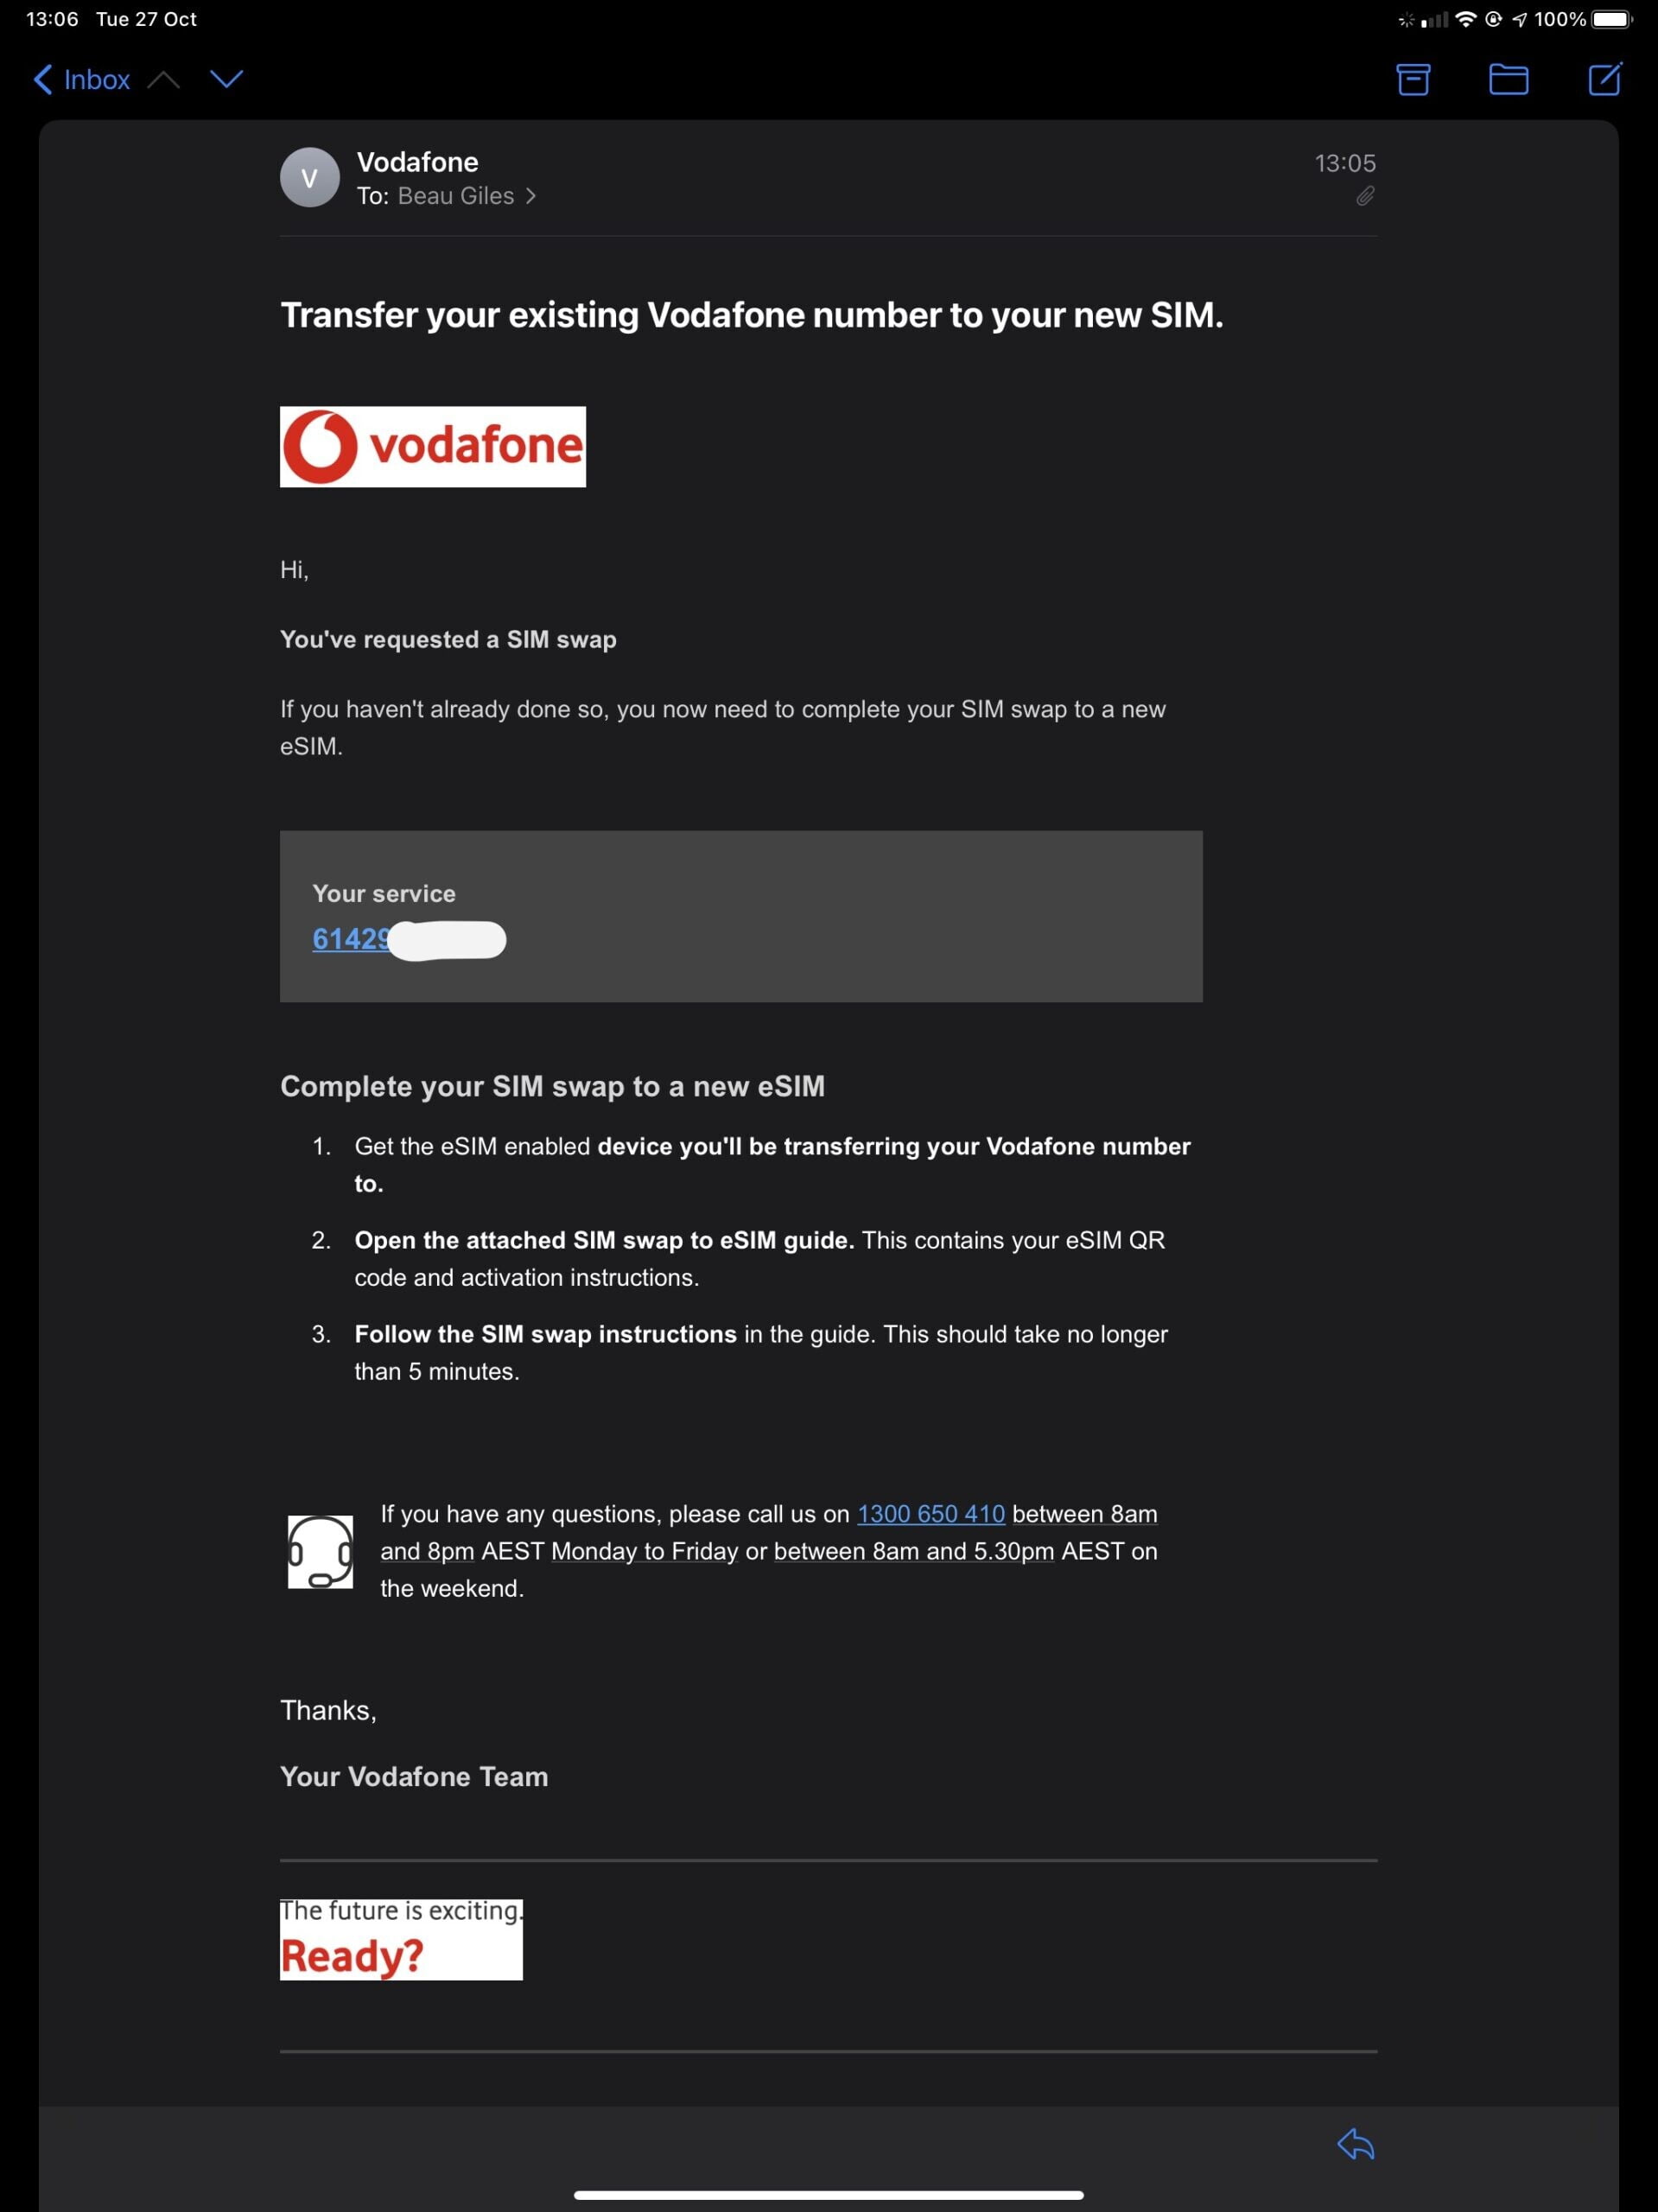
As soon as you press eSIM, you’ll be asked to confirm your email address as well (the eSIM installation instructions are also provided via email later on)
One last confirmation, as after this step your existing SIM will be disabled (whether it’s a plastic SIM in another device, or an existing eSIM)
And that’s it – the eSIM swap has been processed and a new QR code has been generated for you to install on your new phone, tablet or other device.

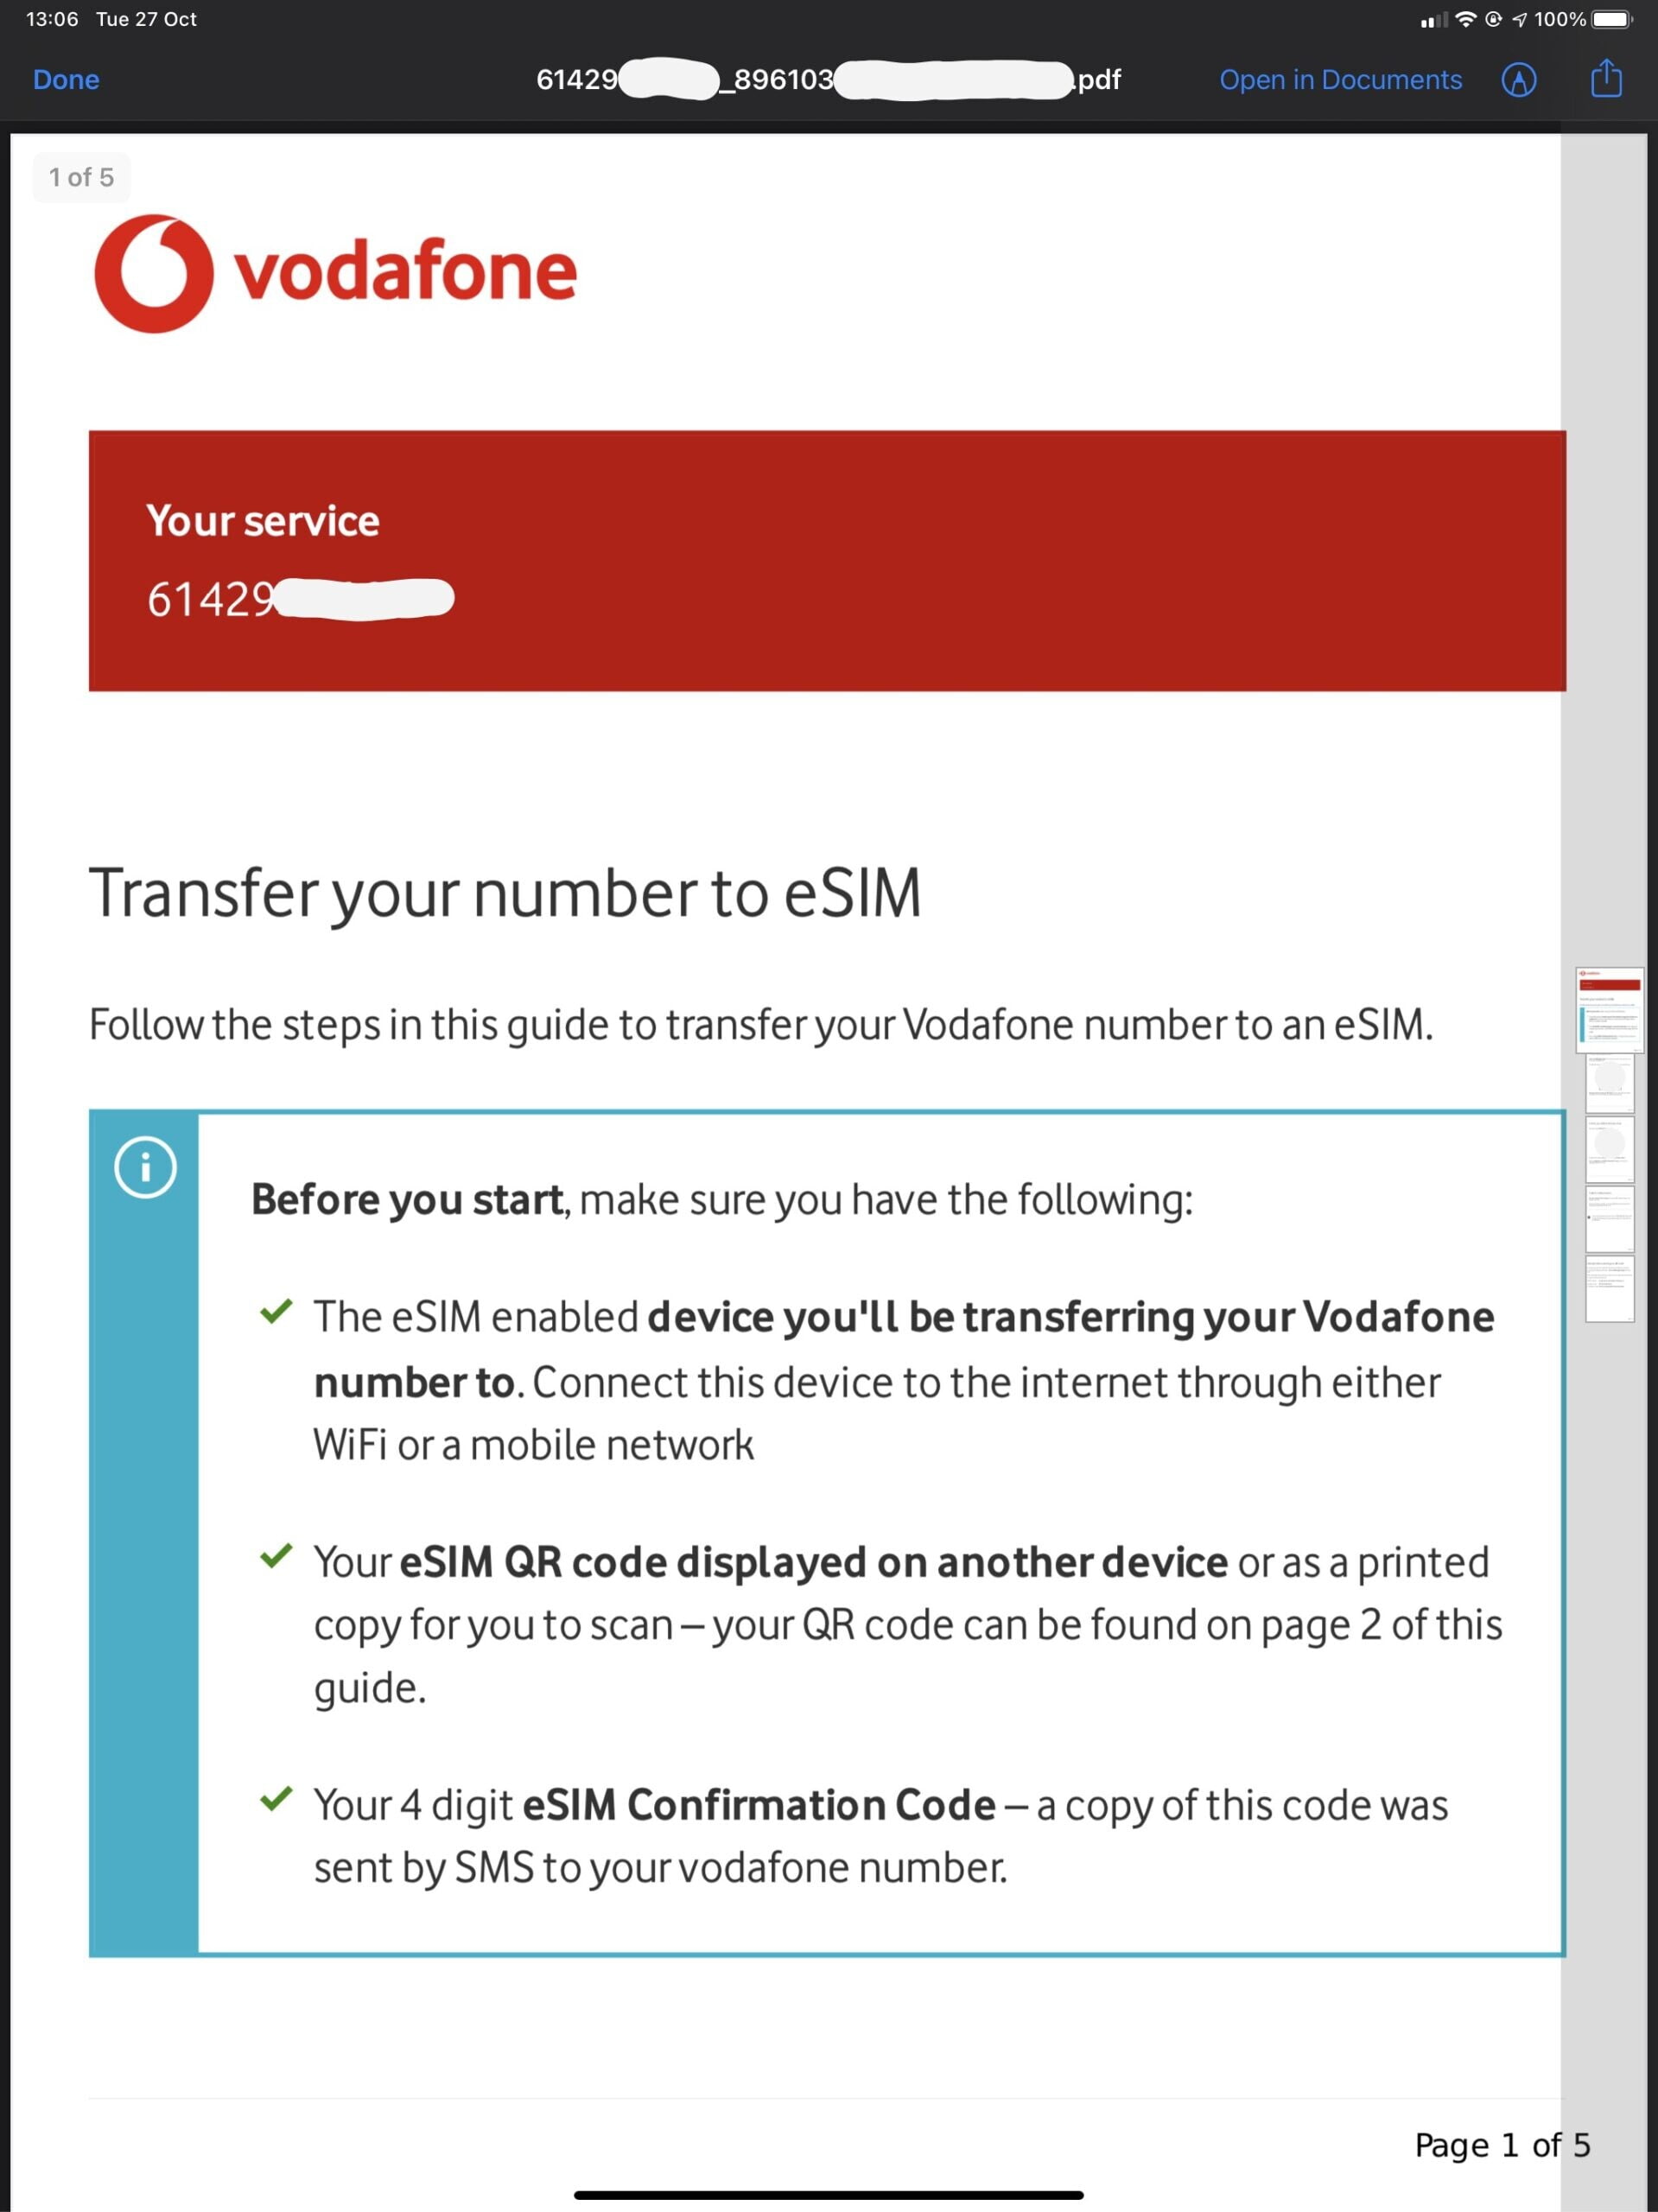
You’ll be given a QR code to scan, as well as a 4 digit confirmation code you’ll be prompted to enter when scanning. This confirmation code is also delivered to your Vodafone SIM which should be received before it’s deactivated.
From here, you’ll simply follow the installation instructions for your device, just like any other eSIM QR code installation. (if you’ve got an iPhone, you can even point your camera app at the QR code to kick things off). For more details, read all about iPhone and iPad, Pixel, Samsung and Windows 10 eSIM installation instructions.
Vodafone also provides detailed manual instructions as well, if you can’t scan the QR code for any reason.

You’ll also receive install instructions and the eSIM QR code via email as well – however this does not contain the confirmation code – take note of the code from the web page, or from your SMS if you’re installing the eSIM later on from your email address.
As you can see, Vodafone is much simpler and straightforward (in my opinion) compared to the Optus and Telstra eSIM self service process. It’s also not restricted to iOS or Android devices, should you wish to install your eSIM on another device like a Windows 10 PC.